I. form 태그
form 태그는 사용자가 입력한 데이터를 수집할 때 사용한다.
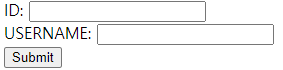
<body>
     <form action="http://jsonplaceholder.typicode.com/users" method="get">
          ID: <input type="text" name="id"><br>
          USERNAME: <input type="text" name="username">
          <input type="submit" value="Submit">
     </form>
</body>
value attribute를 사용해 초기값을 설정할 수도 있다.
<body>
     <form action="http://jsonplaceholder.typicode.com/users" method="get">
          ID: <input type="text" name="id" value="1"><br>
          USERNAME: <input type="text" name="username" value="Bret"><br>
          <input type="submit" value="Submit">
     </form>
</body>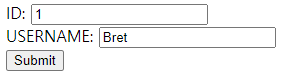
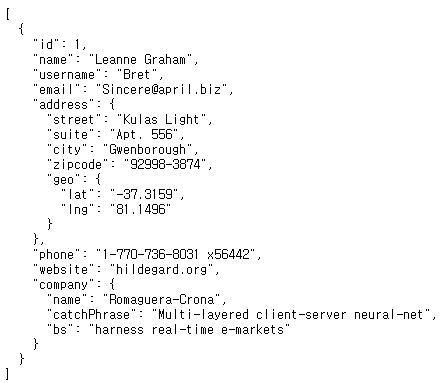
action attribute를 사용해 사용자 입력 데이터가 전송될 URL을 지정할 수 있다. 또, method attribute를 사용해 입력 데이터를 전송할 방식, 즉 HTTP 메소드를 지정할 수 있다. get 메소드와 post 메소드를 선택할 수 있다.
http://jsonplaceholder.typicode.com은 fake REST API를 제공하는 사이트이다. 이 웹 페이지는 Submit 버튼을 누르는 순간 http://jsonplaceholder.typicode.com/users에 get request를 보내게 된다.
get request를 보낼 경우 query string을 통해 데이터가 전송되며, post request를 보낼 경우 request body를 통해 데이터가 전송된다.
위 예시의 경우 http://jsonplaceholder.typicode.com/users?id=1&username=Bret 이 HTTP request header에 포함되게 되며 다음과 같은 응답을 받게 된다.
II. input 태그
input 태그는 form 태그 내부에서 자주 사용하는 태그로 type attribute를 사용해 다양한 종류의 입력을 받아올 수 있다.
입력의 종류가 매우 다양하기 때문에 모든 값을 외우려고 하기 보다는 필요할 때마다 찾아서 사용하는 것이 더 좋을 듯하다.
<body>
     <form action="http://somesuiteserver.com" method="post">
          <h3>button</h3>
          <input type="button" value="클릭!" onclick="alert('클릭하셨습니다.')">
          <hr>

          <h3>checkbox</h3>
          <input type="checkbox" name="fruit1" value="apple" checked> 국어<br>
          <input type="checkbox" name="fruit2" value="grape"> 영어<br>
          <input type="checkbox" name="fruit3" value="peach"> 수학<br>
          <hr>

          <h3>color</h3>
          <input type="color" name="user_color">
          <hr>

          <h3>date</h3>
          <input type="date" name="birthday">
          <hr>

          <h3>datetime</h3>
          <input type="datetime" name="birthdaytime">
          <hr>

          <h3>datetime-local</h3>
          <input type="datetime-local" name="birthdaytime-local">
          <hr>

          <h3>email</h3>
          <input type="email" name="user_email">
          <hr>

          <h3>file</h3>
          <input type="file" name="user_file">
          <hr>

          <h3>hidden</h3>
          <input type="hidden" name="country" value="Norway">
          hidden filed는 사용자에게 표시되지 않는다.
          <hr>

          <h3>image</h3>
          <input type="image" src="cat.jpg" alt="Submit" width="48" height="48">
          <hr>

          <h3>month</h3>
          <input type="month" name="birthdaymonth">
          <hr>

          <h3>number</h3>
          <input type="number" name="quantity" min="2" max="10" step="2" value="2">
          <hr>

          <h3>password</h3>
          <input type="password" name="user_pwd">
          <hr>

          <h3>radio</h3>
          <input type="radio" name="gender" value="male" checked> 남자<br>
          <input type="radio" name="gender" value="female"> 여자<br>
          <hr>

          <h3>range</h3>
          <input type="range" name="volume" min="0" max="100" step="1" value="50">
          <hr>

          <h3>reset</h3>
          <input type="reset">
          <hr>

          <h3>search</h3>
          <input type="search" name="google_search">
          <hr>

          <h3>submit</h3>
          <input type="submit" value="Submit">
          <hr>

          <h3>tel</h3>
          <input type="tel" name="user_tel">
          <hr>

          <h3>text</h3>
          <input type="text" name="user_name">
          <hr>

          <h3>time</h3>
          <input type="time" name="user_time">
          <hr>

          <h3>url</h3>
          <input type="url" name="user_url">
          <hr>

          <h3>week</h3>
          <input type="week" name="week">
     </form>
</body>
III. select 태그
<body>
     <form action="http://somesuiteserver.com" method="post">
          <h3>Gender</h3>
          <select name="gender">
               <option value="male">Male</option>
               <option value="female" selected>Female</option>
               <option value="car" disabled>Car</option>
          </select>
          <hr>

          <h3>Country</h3>
          다중 국적자는 여러 개의 국가를 선택할 수 있습니다.<br>
          ctrl 키를 누른 채로 클릭하면 여러 국가를 선택할 수 있습니다.<br><br>
          <select name="country" size="4" multiple>
               <option value="korea">Korea</option>
               <option value="japan">Japan</option>
               <option value="china">China</option>
               <option value="usa">USA</option>
          </select>
          <hr>

          <h3>거주지</h3>
          <select name="residence">
               <optgroup label="서울">
                    <option value="강동구">강동구</option>
                    <option value="강서구">강서구</option>
                    <option value="강남구">강남구</option>
                    <option value="강북구">강북구</option>
                    <option value="기타">기타</option>
               </optgroup>
               <optgroup label="경기">
                    <option value="김포시" selected>김포시</option>
                    <option value="고양시" disabled>고양시</option>
                    <option value="기타">기타</option>
               </optgroup>
          </select>
     </form>
</body>
V. button 태그
input 태그와 달리 end tag를 갖기 때문에 submit 버튼에 이미지를 넣을 수 있는 등 여러 장점을 갖는다.
type attribute를 사용해 button, reset, submit 중 하나를 선택할 수 있다.
<body>
     <form action="http://somesuiteserver.com" method="post">
          <button type="submit"><img src="submit.jpg" width="50" height="30"></button>
          <input type="submit" value="제출">
     </form>
</body>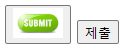
IV. textarea 태그
<body>
     <form action="http://somesuiteserver.com" method="get">
          <label for="1">리뷰를 적어주세요.</label><br>
          <textarea name="review" id="1" cols="30" rows="10" placeholder="100자 이내로 적어주세요."></textarea>
     </form>
</body>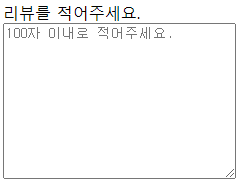
VI. fieldset 태그 & legend 태그
fieldset 태그는 여러 input을 그룹화할 때 사용한다. legend 태그는 fieldset의 제목을 설정하는 용도로 사용한다.
<body>
     <form action="http://somesuiteserver.com" method="get">
          <fieldset>
               <legend>로그인</legend>
               아이디 <input type="text" name="user_id"><br><br>
               비밀번호 <input type="text" name="user_pwd">
          </fieldset>
     </form>
</body>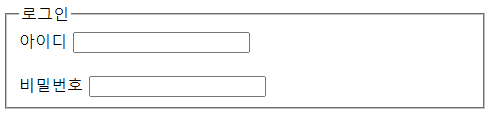
Reference
[1] https://poiemaweb.com/html5-tag-forms
[2] https://www.w3schools.com/TAgs/att_multiple.asp
[3] https://www.w3schools.com/tags/tag_label.asp
Uploaded by N2T
'Frontend > HTML' 카테고리의 다른 글
| 06. HTML5 이미지, 오디오, 비디오 (0) | 2022.08.27 |
|---|---|
| 05. HTML5 List & Table (0) | 2022.08.26 |
| 04. HTML5 하이퍼링크 (0) | 2022.08.26 |
| 03. HTML5 텍스트 관련 태그 (0) | 2022.08.26 |
| 02. HTML5 기본 태그 (0) | 2022.08.26 |